Showing posts with label Crafts. Show all posts

Wednesday, January 7, 2015

Rhythm is tied to me!

We use the Waldorf Essentials curriculum in our homeschool. I can't say enough good things about it. It gives lots of good information and help, but never does so in a way that leaves you feeling guilty. One thing the writer, Melisa Nielsen, is constantly saying is "Rhythm is tied to you."

Well, last night I was up several times with a child who had the stomach flu. When I wasn't helping her I was battling my own cough and sore throat. Then the baby woke up. Max needed to use the bathroom. It was a long night with very little sleep.

I did not wake up this morning at 6:30. I did not begin my day with inner work. Instead, my sweet husband got up to get ready for work and put a show on for the kids so I could sleep in. He had the very best intentions at heart and I truly did appreciate that extra hour of sleep.

But starting the morning with TV...ugh, sometimes it feels like screen time follows the law of inertia and once it's on it's so hard to keep it off, because the kids keep asking for it. And the way I was feeling, I just wanted something easy. But with a little online encouragement and a prayer in my heart, I reminded myself, RHYTHM IS TIED TO ME.

Today might not look like our best days, but it doesn't have to turn into a bad day with screen induced meltdowns and the TV blues. So I pulled myself together and told myself I had rested enough, at least to make it until naptime. I opened all the windows and let in the fresh air, put on some gentle music and put on my red apron.

What is it about that red apron? It's like my uniform, and once it's on...I'm no longer just getting through, I have a job to do, and I do it!

Now here's where I get real with you. Tommy dumped Lucky Charms on the rug and they stayed there until Rob came home from work and vaccumed them up. Nobody got all their morning chores done, and now that I think about it, I don't think any teeth brushing happened either.

But rhythm is tied to me. So we hit our anchors. Circle. Story. Snack.

And then, the best part. We went outside. I've really let that aspect of Waldorf slide the last month that we've all been sick. But the sun was shining and it was a balmy 55 degrees and we were outside for over an hour.

It felt so good. It completely changed my day. This energetic boy needed and loved it too.


My sick girl sat next to me on a chair and worked on some handsewing. I sewed a pillow for Tooth Fairy nights.

Looking at where my morning started, it was surprisingly productive and lovely by the end.

I was exhausted by naptime, and did allow the older non-nappers to watch a show while I snoozed. So it wasn't a perfect Waldorf day. But it was still so good.

Inertia is a real thing.

But rhythm is tied to me.

Wednesday, November 13, 2013

Give Thanks Garland

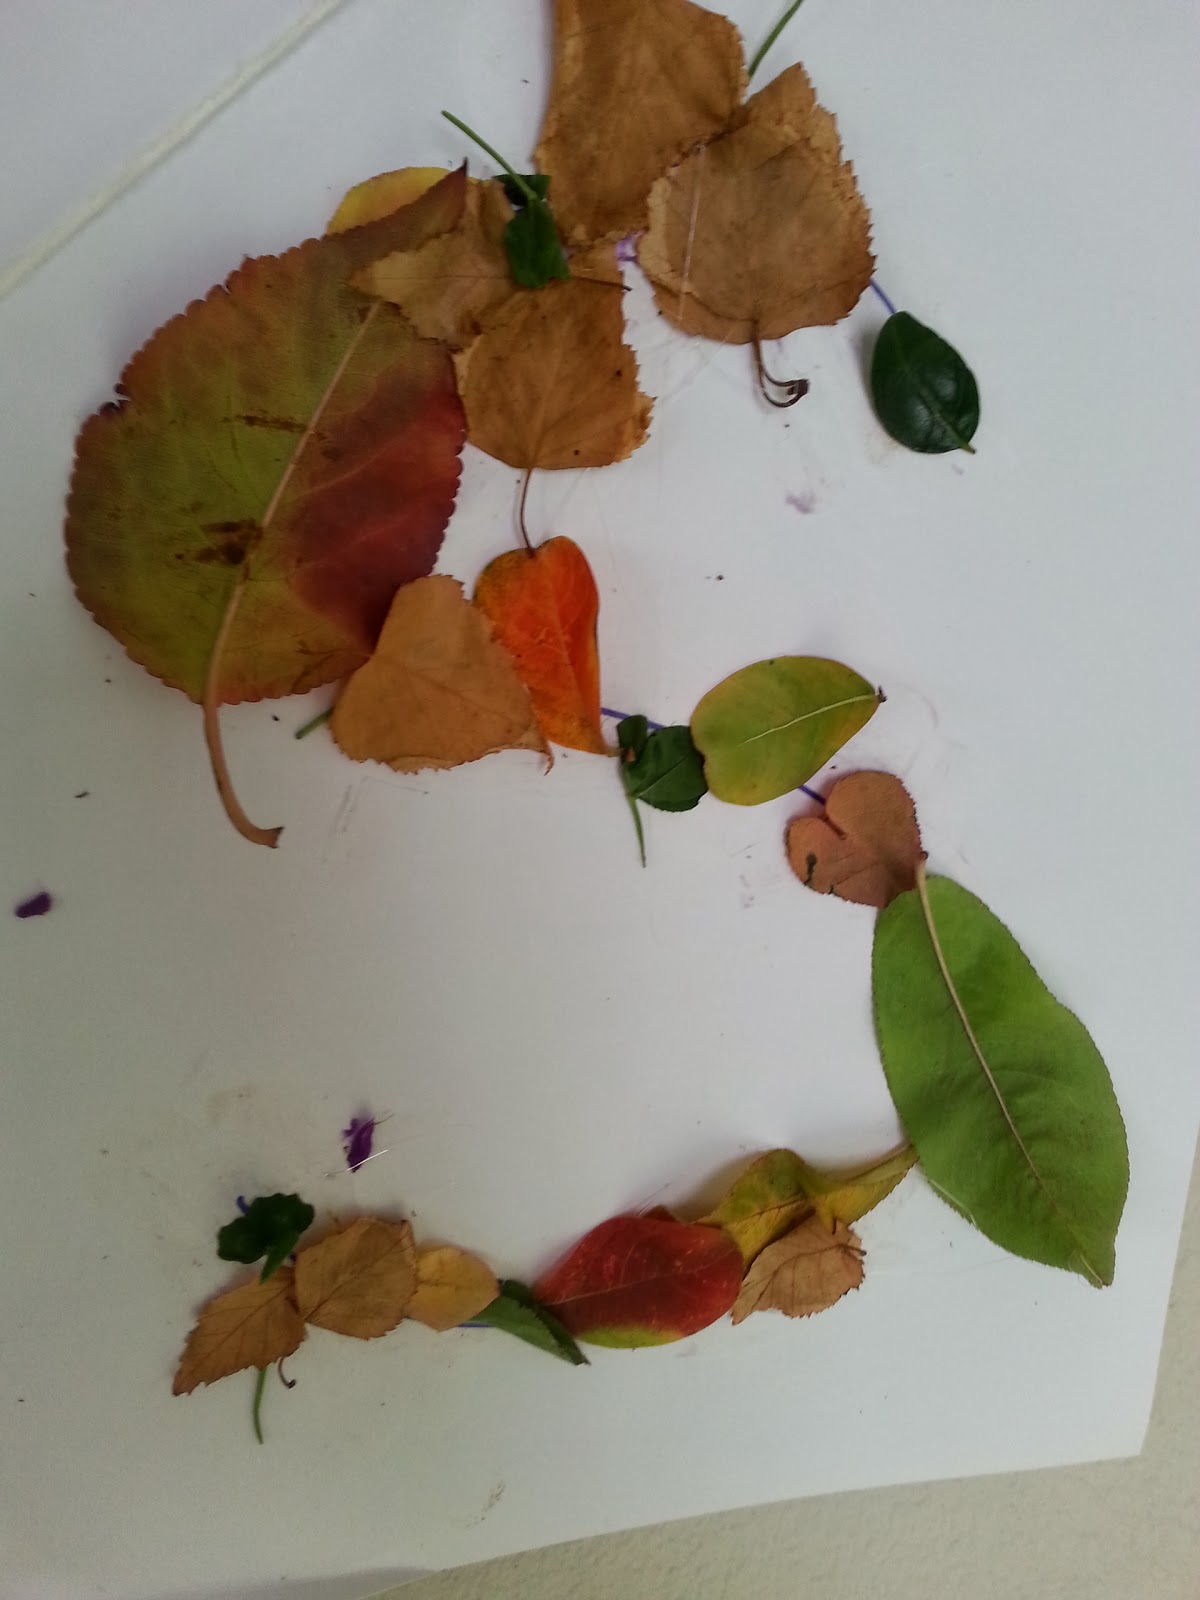
This Thanksgiving garland was so easy and a fun project to do with the kids. We got to go outside, find pretty treasures, and then review our letters! That's like 4 birds in one!
You could make it say anything you want. And you could do it any time of year, using whatever you find on nature walks or in your backyard.


First, gather up your nature materials. Get lots of different things. We were able to get all of ours from our back yard. You may have to search a little more and go on a walk, or to a park. The picture below is how our table looked when we were finished. Get lots of stuff.


Write your letters on cardstock with permanent marker. Hand your kids some glue, and have them go for it. I only had glue sticks and a hot glue gun. The glue sticks worked great for the leaves. But the berries, and larger leaves and flowers required the hot glue gun.

All the letters looked great. But these were my favorites.


The kids actually did most of it. I did the H, N, and T, since they required the glue gun. I technically did the A, too, but it was Max's design and he brought me all the berries to hot glue.

This craft is basically free and really cute.Because we're in a rental, I didn't want to put holes in my wall, so I had to make do with hanging it from the stair railing. Yarn and clothespins look cute, but I'm sure there are numerous other ways to hang up your letters.

This was fun and the kids loved it. Try it!


Sunday, December 9, 2012

Christmas Paper Lanterns

I was trying to think of a cost and time-efficient gift to give to my neighbors and friends. I wanted it to be handmade, heartfelt, and reflect the true meaning of Christmas. Into my memory walks this picture. Isn't it a beautiful paperbag lantern? There were tons of them my freshman year at Temple Square in Salt Lake City saying different things in different languages.


Here's my cute freshmen self with my old college roommate and friend for life, Whitney. Don't we look so cute and young? Now Whitney is in law school and I have two kids and the next time we take a picture here we will probably be going through a mid-life crisis. ;)

But that's beside the point. It was the paper lantern that inspired me. I didn't have paper bags (at least I didn't think I did. I've since found some. But making little lanterns like this isn't that hard.

Here is one of my creations from today. Not as fancy. But the same message.

I used cardstock so as to be less of a fire hazard (much less risk of the paper crumpling into the flame or anything, but tomorrow I am getting flameless tealights anyways, just to be safe). I also made some pretty ones out of green and red construction paper.

Cut a standard size piece of paper in half. On one side either draw the picture or write the word that you want on your lantern. Be sure to leave about an inch or space between your word or picture and the bottom of the paper. If you are doing a word, write it flipped backwards so that the side of the paper not written on is the side everyone will see. Then take a push pin and poke holes along the lines. You can add embellishments or add thicker lines in some places if you are artistic or know calligraphy.

When you are done punching holes, cut 5-7 darts along the bottom of the paper. Then wrap paper around a cardboard circle, folding tabs between darts over the cardboard and taping to the circle. Tape the piece of paper together at the sides to form a cylinder. Add a handle. And you're done!

This is definitely a project for older kids (at least the punching part), but if you make a lantern of white paper, your younger kids can color on the paper and that shows up against the candle light and looks quite pretty.

Once again, these make lovely gifts, and we handed some out tonight with a real candle burning in them, but will be switching to flameless. I wouldn't leave this lantern unattended for safety reasons, but it was quite fun and pretty to hold while caroling!

Thursday, April 26, 2012

Mother's Day Candles

When you think about gifts for Mother's Day, what to you makes the perfect gift?  For me it is something thoughtful, perhaps handmade, personalized, and frugile (let's face it, you have to buy for mom's, grandma's, daughters, it can get expensive).

These candles are the perfect Mother's Day present (or any time of year present if we are completely honest).  They only cost whatever the candle costs plus a dollar for tissue paper.  I got these jumbo ones at Walmart for about 7.50 a piece.  You can personalize them with any quote, note, or picture your little heart desires.  And you get to feel crafty giving a homemade gift!

I found the idea for these candles here. If I were to do it again, I think I would cut out the background on the pictures and just have the people on the candle (like shown on the website).  The link I provided gives very broad instructions, here are some tips to make this project easy-peasy.

1 - Cut your tissue paper (yes just regular tissue paper gift wrap) down to about the size of a regular sheet of paper.  Then tape the tissue paper around the edges to a piece of printer paper.   This makes it possible to print your picture or graphic onto the tissue paper.  Then print it out.

2 - Cut out picture and pin to candle.

3 - The original instructions call for a heat gun.  A hair dryer worked just fine for me.  You are melting the candle to the tissue paper.  Your picture will look like it is starting to get wet, you want the whole picture "wet" or melted to the candle.  Make sure you have it totally smoothed out because it can get wrinkled.  Also don't overdo it on the melting of the wax will bleed through the tissue paper.

And you're done.  In about 10 minutes.  Now go make one for all the mothers in your life.  Then make some more to decorate your house.  I am thinking you can print off quotes and put them on your candles.

By the way, I found this quote that would go perfectly either on the candle or in the card with the candle.  

The love of a mother is the veil of a softer light between the heart and the heavenly Father. ~Samuel Taylor Coleridge

Friday, March 9, 2012

My First Waldorf-style Doll

I love Waldorf-style toys.  However, they get pretty pricey.  So I have decided to try and make them on my own.  I mean, that is kind of the whole point of Waldorf toys, that they are handmade and your children can watch if not help, making them more special.  A Waldorf doll can run anywhere from $55-$150.

 I made one using this tutorial for less than $10.  It did take a few hours, and would have taken longer if I hadn't taken a few shortcuts, made necessary by the fabric I had on hand.

I will not run you through the tutorial, I will just tell you the changes I made.  I did not have an old flesh-colored shirt or any flesh colored fabric.  I didn't want to go out and buy any for a first try either.  So I used panty-hose for the head, hands, and feet, and a receiving blanket for the body.  I just layered a few kneehighs on the head to give it the right color and non-sheerness.  Using the hosiery actually cut down on time and cost, but it will probably have an effect on how long this doll lasts.


Using a receiving blanket for the body means that this doll is permanently in her "jammies".  I have not made any clothes yet, but they will either have to coordinate or cover, but I don't think Jane will mind.

The neck is a little floppy.  I am thinking that will probaby be fixed by using actual cotton fabric with the next one.

For the jand and feet I just sewed a small "bag" of hosiery, stuffed it with fiber-fil, and then sewed it to the end of the arms or legs with a straight line to create a sort of joint.

I can only improve, and this beautiful doll deserves a sequel.

Friday, March 2, 2012

Use It Up or Throw it Out!

If you are like me, you have several craft projects started but not finished.  This leads to a lot of clutter and ultimately wasted material.  Today, I want to encourage you to start going through those crafts of yours and either finish or repurpose one of them TODAY!  It doesn't have to be hard.  Not going to finish that quilt you started 4 years ago?  Sew a few of the squares into a table runner, or better yet, what about a skirt?


I found some already-made quilt squared from what was supposed to be a "friendship quilt".  I never made the quilt.  So yesterday I took those squared and made a skirt!  Easy.  Just sew the squares together in a line.  Hem up one edge.  Sew ends together to form a circle.  Fold upper edge over to create an elastic casing.  Put in elastic, and you're done.  Of course you can make several layers for a longer skirt.  But not only did I get rid of excess materials, I got Miss J a new spring skirt out of it!  Talk about killing two birds with one stone!
**Please excuse the unmatching shirt and my exposed feet!

What about all that yarn that you were going to make a baby blanket out of?  If you aren't going to finish the blanket, consider making some children's toys out of the yarn.  The projects are smaller and thus faster!  Plus you might actually get some use out of it!
Here are some pattern links to get you started

What about all that excess fabric?  Try one of these cute (and free) toy sewing patterns.  There are plenty more if you just google "free fabric toy patterns".  These toys are only made cuter by using unique colors and fabric patterns.

So have at it!  W

Wednesday, February 15, 2012

Fun With Felt: Pirate Hook and Eye-Patch

What kid doesn't want to be a pirate?  Fit them with an eye-patch and a hook and they will be sailing the seven seas in no time!
 1 - Draw a hook with a large, wide base.  Make the hook just a touch bigger than you would think since you will be sewing and stuffing it.  Cut out two hooks.
2 - Sew The two hooks together, wrong sides together leaving the base and the tip open.
3 - Stuff with fiber-fill until stiff.  Close end of hook.

4 - Cut out a large black circle and zig-zag stitch around the edges to reinforce.
5 - Open up the base of hook up to the beginning of the stuffing.  Sew each half of the base to the center of the circle, as shown below.

6 - Sew a small, thick strip of felt (reinforce with a zig-zag stitch) to the underside of the black circle.  This will be the handle for your child to hold.

7 - Cut out an eye patch and attach to two black ribbons or pieces of felt.  I tried to attach my felt to elastic to make it adjustable, but this only stretched out the felt.


 Ahoy, Matey's!  Arrgh!  Walk the plank!


Monday, February 13, 2012

Fun With Felt: Heart Purse

This little creation takes about five minutes and is perfect for Valentine's Day.

Simply cut two identical hearts and sew around the edges of each individually.

If you wish two decorate your hearts with any sort of applique's, do so now.

Sew the two hearts together, leaving the edge out, from the bottom point up until bout the height of where the top comes down and splits.  (I hope that made sense!)

Cut out two long strips of white cloth.  Zig-zag stitch down the middle of each strip to reinforce.

Sew each end of one strip to one heart, so that the bag can open wide.

Fill with goodies for Valentine's Day!

Sunday, February 12, 2012

Fun With Felt: Travel Road Set

This post is the beginning of my "Fun With Felt" series.  I love making fun things with felt.  The nature of the fabric and crafts you make with it don't require perfection, and in fact imperfections only add to whimsical character of your creations.  Another plus for felt is how cheap it is!  I bought two packages of assorted colors of felt at Wal-Mart for $5-$6.  I just used whatever color of thread I had on hand.  So far with those two packs of felt I have made three little toys/gifts for the kids.  Not a bad bang for your buck!

This first post is about making a travel road set.


It folds flat to easily fit in a diaper bag.  Take it to church or on an airplane for a great quiet activity.  Just don't forget the cars and trains!

 I didn't do a good job of taking pictures through the whole process.  But it shouldn't be too hard to follow along.

1 - Choose two dark green pieces of felt.  Sew them together like the binding of a book (right sides together about 1/8-1/4" seam allowance).
2 - If you want to make your road set sturdy, cut out two pieces of poster board slightly smaller than the size of each "page".
3 - Cut out a road from the black felt.  Cut it in the shape you wish it to take on the felt.  Don't just try to cut a straight line and curve it to fit your needs.
4 - Sew each edge of the road to the green felt.  Don't worry about the unfinished edges (unless they are really large and need to be trimmed).  This is handmade and the felt makes the unfinished edge look cute.
5 - To make the bridge cut two straight pieces of brown felt slightly longer than the desired length of your bridge.  Remember you are going to make your bridge pop up, so cut it the desired length once in it's rounded shape.
6 - Sew three edges of your bridge together leaving one narrow end open.
 7 - Cut at least three strips of posterboard to fit inside the bridge, leaving about an inch of space the end.  You may want to cut more strips to get your bridge to the desired stiffness.  Insert the posterboard into the bridge.
8 - Sew the unclosed end of the bridge to a piece of velcro or attach it to a snap.  I used a snap, but I think velcro would work better with the felt.  Make sure that the bridge is now completely closed.
9 - Attach the opposite piece of velcro or snap where you want the bridge to attach on the green felt.  Sew the other end of the bridge to the green felt where you wish it to start.  Now you can detach the bridge to close the road set and put it back in place whenever it is in use.
10 - Cut out several very thin strips of dark brown felt and sew right down the middle to create the railroad tracks.  Sew the long pieces on first before attaching the cross-pieces.
11 - Take a brown paint-marker and draw the track onto your bridge.  (You could put the track onto your bridge before you sew it together, but this was just easier for me.)
12 - Add any other decorations to your set as you wish such as lakes, sand, town, etc.
13 - Choose a color for the "cover" and sew those two pieces of felt together just like you did thie two green pieces.  If you wish to attach pockets for cars and trains, do so now on the right side (not the side with the binding sticking out).
14 - Sew the cover to the gren felt right down the middle of the book to create the fold. 
15 - Place the posterboard pages between the green felt and cover on each side of the binding and sew around entire book.

You're done!  Hand it off to the little boy in your life the next time you need him to be quiet or hold still!

Friday, May 20, 2011

How to Make a Tutu

Every little girl loves a tutu and whether you want one for a photo shoot, Halloween, or just the dress up box they are very easy and affordable to whip up.

You will need:

measuring tapeelastic I use anywhere from 1/4" to 1/2" wide elastic. Use thinner elastic for younger babies.
scissors
tulle I like to buy my tulle at tullesource.com you can get it on a roll there which makes cutting a lot easier. I don't recommend doing this kind of tutu with tulle straight off the bolt, the cutting is a pain in the neck! When I buy the tulle on a roll I either get 6" width, and cut it in half as I go, or 3" width and leave it that way.
sewing machine or safety pin

1. Measure around your child's waist and then measure from waist to wherever you want the tutu to hit (knees, shins, etc.)
2. Subtract 1.5-2 inches from the waist measurement and cut you elastic to this length.
3. Sew the ends of your elastic together, being sure to reinforce the seam with by going backward and forward on the machine a few times, or pin the ends together with the safety pin if you don't want to sew.
4. Double your length measurement and cut your tulle into strips of this length
5. Now tie your tulle onto the elastic waistband. I usually tie on two or three pieces at a time for a fuller tutu.
Note: there are two kind of knots you can use, one is a square knot which I prefer as I feel it allows for a fuller tutu. The other knot is kind of a slip knot where you fold the tulle in half, bring the tulle behind the elastic and bend over the top of the elastic. Draw the two ends of the tulle up through the loop created by the fold and then pull the ends to tighten around the elastic. This kind of knot lays a little flatter than the square knot, but it is bulkier so you can't get as much tulle on the elastic.
6. Continue to add tulle until your tutu achieves desired fullness

**If you want a multicolored tutu, experiment with the color ratios. You may need to use a 2:1 ratio for some color mixes in order to achieve the right balance.
**For a Layered Tutu, cut one color of tulle shorter than the other and tie onto the tutu, always being sure that the shorter tulle is lined up on top of the longer tulle
**Decorate your tulle by hot gluing on flowers or tying satin ribbon into the tutu

Thursday, April 28, 2011

FOSTERING CREATIVITY

The definition of "Creativity": the ability to improve. I like that. So many times I judge creativity as the ability to sew, toll paint, or do other crafty things. While all of these are parts of creativity, it encompasses so much more.

First I think all people want to improve...improve themselves, their surroundings, relationships, community and many other things. I think that is why we are drawn to the creative process. Our Father in Heaven and Jesus Christ are the ultimate creators. We are children of God, so we have inherited this ability and desire to create or make things better.
So have our children...I often wonder what makes the natural creativity that children are born with sometimes wither and die. I wonder if we as Mothers nurtured this ability and process more and expanded our definition of creativity, if our children would be happier children and adults.

We need to remember that we can be creative in art, music, writing, problem solving, but also in movement, cooking, learning styles, imagination, science, play, and many other ways. We need to encourage our children in all areas they are being creative. Whether they are drawing or trying a science experiment. We should never pass judgement, let the child be free to explore his creative styles and processes. Often times we want to step in and show children how to do things correctly.

Now don't get me wrong, all children need direction and need to taught the correct way to do
things..but I have found that I save their self-esteem if I teach them in a controlled, scheduled way.
For example I know children love to draw, and they love to be able to draw pictures that others can identify what was drawn, so I give my little ones "drawing lessons". During the summer months or before the kids go to school, I will lead them through a lesson on how to draw simple things. This acti
vity fosters their creativity and esteem...they love being taught, and the finished product. They are then free to use this knowledge the next time they are independently drawing. I would never step in while they are in the middle of a picture and show them how to draw whatever they are creating. I have seen this happen and every time the child quickly gives the picture and experience up.
Being truly creative in music requires lessons, cooking requires a basic recipe, ballet requires the knowledge of the steps... the process is the same for all areas. You must gain knowledge either by trial and error or a controlled lesson.

There are so many ways we can encourage creativity. We need to give our children time to be creative. We should not over schedule our children with lessons, or sports. Non-structured play is a key component to creativity in children. We need to provide plenty of materials for creativity. Each day I try to put out play dough, or paper and markers, paint, construction paper, tape and scissors...no direction just let the children create. Having good music in the air helps with creativity.
Plenty of outside play also stimulates creativity. Showing and explaining the world around our children fosters creativity. Take your little ones to museums, national monuments, libraries, concerts, plays, etc. and explain what is going on....I have found that a small amount of time on the Internet showing things and places I don't have access to is a great way to stimulate creativity and vocabulary. Read to your children!!! Have your kids with you while you go about your daily activities, it will expand their world and ultimately their creativity.

I also feel their are certain things we do that are a disservice to our children's creativity. Too much TV, video games, and computer time should be avoided.

According to several studies, Children who have been allowed to develop creativity are generally good students, better problem solvers, have more self confidence and are happy.

I hope all of us will try to always foster creativity in our children and ourselves!

Thursday, April 21, 2011

Wishing Tree

This is an activity for older children who can write, or at least dictate to you what they want to write. I got this idea out of a parenting magazine and have always wanted to try it. They called it art, I don't know about that, but it still seemed fun.

Turn a tree in your yard into a wish tree. Put up a sign that reads "Wish Tree" and some directions of what to do. Somewhere by the tree and sign put a container with your "supplies". All you need is some scrap paper, a writing utensil and string. The idea is for people to write down a wish and hang it in the tree. You probably want your family to write down some wishes and hang them in the tree first so that people get the idea.

This would also work really well as a Thankful Tree, Why I Love America Tree, etc. depending on the time of year and what you want your family to think about.

Don't have a tree you can use? You can draw one and hang it somewhere inside your house, or use some sort of necklace hanger, or even bring a few branches of a tree inside your house and set them up. Have fun seeing what your kids or neighbors are wishing for!

Tuesday, April 19, 2011

Homemade Birdfeeders

I love to make homemade birdfeeders with my daycare and own children. We hang them on the tree outside our kitchen window, and enjoy watching the birds. They are very easy and quick to make, and I think it teaches the children compassion and service. Children love knowing they have helped the hungry birds.

You will need: One pinecone for each feeder
Peanut Butter
Wild Birdseed (Grocery stores will have this in the pet area)
Thread

Take pinecone and with a butter knife spread a thick layer of peanut butter all over it. Small children can do this with help from Mom. Then roll peanut buttered pinecone in a bowl of birdseed.
Wrap some thread, yarn or twine around the middle of pinecone and tie to a tree branch. Enjoy the birds...it may take a week or two for them to find the cones, but they will find them.

I took this picture of a sparrow enjoying a snack last week!